If you want to learn how to teach a child to write their name for the first time, it can be tempting to whip out a piece of paper and start tracing letters.
Children who are in their preschool years need to develop important pre-writing skills before moving onto pen and paper.
Read on to find out how you can go about preparing children and eventually teaching them how to confidently and correctly write their names.
When Should a Child Be Able to Write Their Name?
Firstly, you may be wondering if your 3 or 4-year-old should be able to write their name or why you are practising so often and your child is still not properly writing it.
It’s important to understand that children first start randomly forming and experimenting with letters as part of the developmental stages of drawing.
Scribbles and lines turn into loops and spirals and then shapes.
At some point, between 2 and 4, shapes that vaguely resemble letters start to emerge (like the capital letter T or V). These are not yet necessarily formed on purpose.
At around the age of 4, children will probably start to “write” on their drawings, which means they are experimenting with forming letters they see often – in their environment, their name written on their artwork, etc.
They may proudly announce that they are writing. Children are usually more exposed to their name than any other word if it’s written on their belongings, artwork and especially if a parent is trying to practise it often.
The simple answer is don’t worry about it. There is no age that your child must know how to write their name. It will probably start emerging around 4 or 5 years.
While it is inappropriate to start teaching and expecting children to write too early, it is understandable that you may want to practise just their names.
There are ways to do this that are fun and developmentally appropriate and that will not cause stress.
Should Children Write their Names in Capital Letters or Lowercase Letters?
What is the correct order for teaching children about upper case and lower case letters? It is usually best to start with upper case letters.
It is easier for a young child to learn their name in capital letters first, as these are made up of simpler lines and curves.
Your child will also experience more success when actually being able to form the capital letters.
While this is still a much-debated topic, this article on teaching capital letters first is an excellent explanation of why it’s best not to introduce a young child to lowercase letters.
The occupational therapist states:
“No matter how excellent the instruction, not all five-year-olds have the underlying spatial-temporal perceptions or visual motor skills to support learning lowercase.”
When a child learns incorrect letter formation, it becomes more difficult later on to form the letters properly.
Here is a common example of how children write the letter a when they don’t have fine motor control yet, or they have not been taught the correct formation.
They tend to draw a circle and then attach a line or stroke onto the side. This will not be an easy habit to undo.
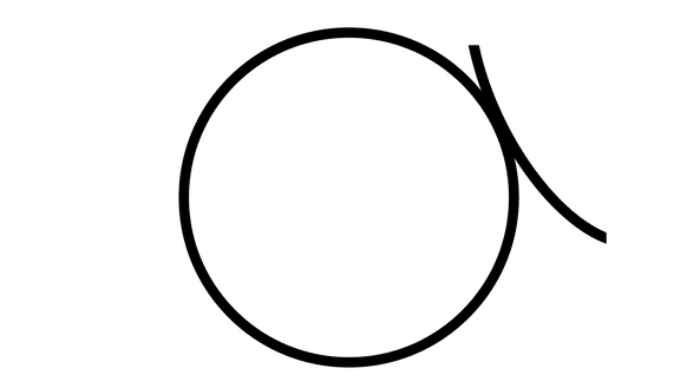
Here is an example of how to teach an older child the correct formation. Start at the top, go around to the left, all the way back up, then straight down.
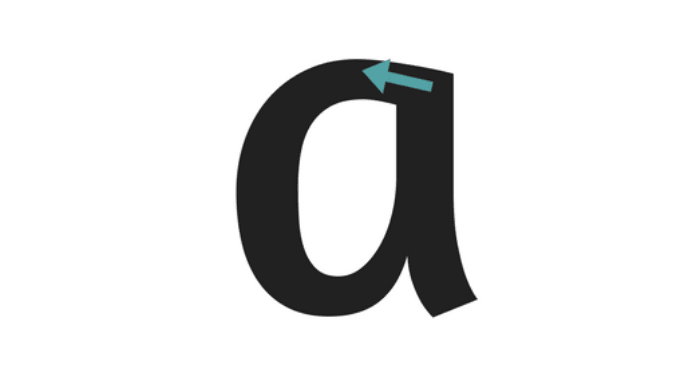
This particular font has a flick at the bottom. Some schools use a font similar to this, or one where the a has a straight line without a flick.
This does not matter too much. It is more important to focus on the correct direction and not lift the pencil to form the line going down.
It is good for children to see their own name in their environment with the first letter capitalized only, but they should see it in capital letter format when they are specifically practising writing it.
Learning to write their entire name – first name and last name – is a bit too advanced at this stage and can be taught at a later stage.
How Do You Teach a Child to Write Their Name?
Writing is a process of developing many skills, and the very last step in that process is writing letters on a piece of paper with a pencil or pen.
Children begin writing by the first grade because by then they have developed the necessary fine motor control to write correctly and use the correct pencil grip.
For preschool children, the first step in the puzzle is to develop their fine and gross motor skills, and later to start learning to write their names by being introduced to letters of the alphabet in many different informal ways.
For a while, put away the worksheets, traceables and online apps. Play-based learning is the best way to give children a strong foundation in writing.
There’s a reason children are wired to play for the first few years of their life. It’s how they learn. Everything else is less important.
Here is a quick breakdown of the steps involved in teaching your child to write their name.
1. Develop General Fine and Gross Motor Skills
In order for children to be able to write – a skill that requires fine motor control – the first thing they need to develop is their gross motor skills.
Think of this as starting large and going smaller over time.
Gross motor skills can be built through everyday movement and play activities.
Children should experience movements such as climbing, running, swinging, jumping, skipping and playing with balls.
They will naturally develop these muscles during free play and you can also play games with them to specifically work on these skills.
Children develop their gross motor skills first and later their small muscles strengthen.
Introduce fun activities to develop fine motor skills such as drawing, painting, playing with beads, using pegboards, threading, lacing, etc.
These are all vitally important as children must have good muscle control before they can hold a pencil and write.
Start with these fine motor skills toys you probably already have at home.
2. Let Children See Their Name Often
An important step in learning to write a name is name recognition.
A child who sees their name often will start to understand what it represents, imprint it in their memory, and have greater success when attempting to write it.
Write your child’s name on the top left-hand corner of their pictures. This also teaches how we write from left to right and top to bottom in English.
Label their belongings, bedroom door if possible and any other places that are appropriate.
To help you teach your child the letters of their name, print the full name out in big on a piece of paper or banner and keep it visible during all the following activities.
3. Walk the Letters
Using chalk, draw one letter at a time of your child’s name in large letters on concrete or paving. The letters should be big enough for your child to walk around them.
Practise correct formation by starting in the correct place and moving along the letter in the correct sequence. Use language to explain the formation.
Let’s start here. Walk all the way down. Turn around and go up all the way to the top.
4. Use Messy Play
Messy play is the best way to teach name recognition and writing. Focus most of your attention on these kinds of sensory activities.
Try to use all the senses if possible – touch, sound, smell, taste and sight. When more senses are incorporated, the concepts are learned quickly and associations are made.
The messier the activity is, the more likely your child will remember the letters they were playing with and their shapes.
- Use a large paintbrush dipped in water to trace over medium-sized letters drawn in chalk on the paving.
- Form letters in shaving cream.
- Form letters in a tray of sand or in the sandpit.
- Bake letter cookies.
- Say the letter sounds out loud as you form them (not the name ‘bee’ but the sound ‘b’).
- Write the letters on big pieces of sandpaper and get your child to trace them. Feeling the rough texture is an excellent way to imprint the formation in your child’s mind.
- Use finger paint to trace over letters on large paper.
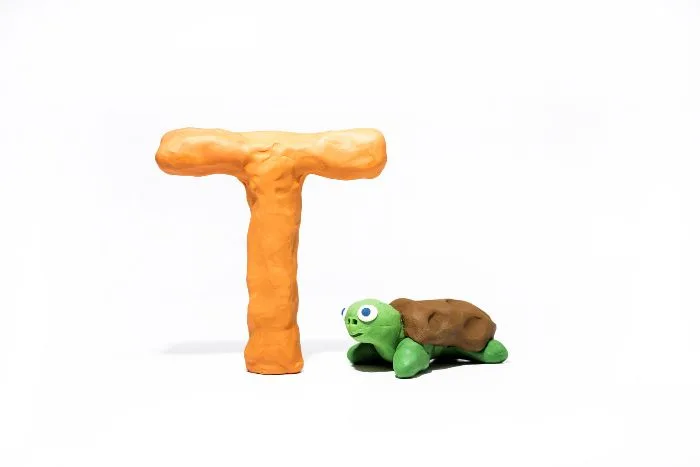
- Using playdough, build each letter in the name. Try making something that starts with that sound.
5. Play with Letters
Let children play with plastic, foam, rubber or wooden letters.
Feel the letters and trace them with your fingers. Build your name with the letters. Say the sound of each letter.
Fridge magnets are a great way to play with and feel letter shapes.
Here are some great letter recognition activities for preschoolers.
6. Do Pre-Writing Exercises
Making lines and patterns is a great way to introduce the shapes and formations found in letters. It’s an important part of the early writing process and requires lots of practice.
Try these pre-writing exercises too.
7. Start Tracing Letters
When your child is older (and ready) and you have practised letters in multiple ways, they can start tracing big letters on a sheet of paper.
- Print each letter onto an A4 paper.
- Get your child to trace over each letter with their finger.
- Ask them to trace that letter onto your back.
- Then take coloured wax crayons and trace the letters a few times.
Over time, you can start to decrease the size of the letters. Print your child’s name in grey letters or dotted letters and ask them to trace the letters in pencil.
Later, write their name in small letters on their work and get them to trace over it, until they are writing it independently, using the correct formation.
If your child experiments with writing their name before the process is complete, don’t stop them. Allow them to experiment with writing freely.
Remember to have fun and let your child progress through the steps at their own pace.
Here are more fun name writing activities for young children.
Ebun Obadofin
Sunday 21st of May 2023
I'm excited at these educational materials and information. I'll like to subscribe for it
L.R.
Thursday 4th of May 2023
Thanks. I enjoyed the article.
Tanja Mcilroy
Friday 5th of May 2023
Glad to hear it!
Yani
Thursday 13th of October 2022
This article is helpful, thank you very much. Allow me to translate it in indonesian language. Hope that way makes my friends more understand.
Tanja Mcilroy
Friday 14th of October 2022
Thanks, Yani!
Andrea
Saturday 2nd of May 2020
This information is terrific! I totally agree with everything you advocate - let our kids learn from ground level (motor skills) and move up, brick by brick, with practice as the cement between the bricks. Move too fast and the bricks will wobble because they don't have the practice to keep the new skills balanced. Try to push ahead without the structural bricks in order and you are guaranteeing a collapse later on!
Tanja Mcilroy
Saturday 2nd of May 2020
I love your analogy Andrea. Thanks for sharing your thoughts! Tanja