Here are some fun name-writing activities for preschool kids to try at home or school. There’s also a printable of these activities at the end of this post.
Ditch the boring tracing sheets and workbooks and try some of these real, hands-on learning experiences.
When teaching children to write their names, remember these five key principles:
- Engage the Senses: Use multisensory activities like moulding letters, baking name-shaped cookies, and singing name songs to stimulate touch, taste, smell, sight, and hearing.
- Use Large Muscles: Build gross motor skills with activities like walking the letters of their name, helping kids learn through full-body movements.
- Involve Fine Motor Activities: Encourage fine motor development with materials like crayons, playdough, and small objects, introducing pencils later for better grip.
- Model the Name Correctly: Show correct letter formation often and label items with their names to help kids recognize both uppercase and lowercase forms.
- Save Tracing for Last: Start formal tracing only after kids have practised through hands-on activities, ensuring they have the motor control and pencil grip needed for refining letters.
Try these simple name activities with your kids:
1. Shaving Cream
Pour shaving cream onto a small tray and let children trace their names into it. They will love the texture and the fun sensory experience.

2. Sandpaper
Use a sheet of sandpaper from the hardware store. Trace the letters onto the rough surface. This provides a good tactile experience and helps the brain to feel the formation of the letters.
You could also write the letters on the paper in chalk and then get your child to trace over your letters.
3. Jumbo Chalk
Start by writing the name in large, life-sized letters on the pavement outside with jumbo chalk. Invite the child to walk along the letters as if walking a tightrope.
Then, make the letters slightly smaller and ask them to trace with their fingers. The letters should be big enough that they have to move their arms from left to right and up and down, crossing the midline while tracing.
4. Rope
As in the previous activity, form the name in life-sized letters and ask your child to walk around each letter as if walking along a tightrope.

Make sure to teach the correct formation by starting in the right place, as you would when writing the letters. This activity allows children to feel the letters using their whole body.
5. Playdough
Playdough is an excellent material for teaching letters through tactile experience. Build the letters of your child’s name together onto a piece of cardboard and leave it to harden as a permanent nameplate, or bake it in the oven to harden.
6. Finger Paint
For a fun, messy activity, give your child some finger paint and let him “write” his name with his fingers. This will encourage fine motor development of the small finger muscles.
You could also write the name in pencil on a large piece of paper and let him trace over your letters.
7. Salt
Make a salt tray by pouring some salt into a small tray or dish. The salt can be substituted with sand or any similar substance. Trace the name into the sand.
This is a similar experience to the shaving cream activity and will help your child remember the letter formation by feeling her fingers move through the salt.
8. Natural Materials
Why not go into your garden and make use of what nature gives us for free to teach name writing?
Gather small stones, twigs or leaves and get creative by joining them into the shapes of the letters. Provide some wood or craft glue and paste them to make a nameplate to keep.
9. Beads
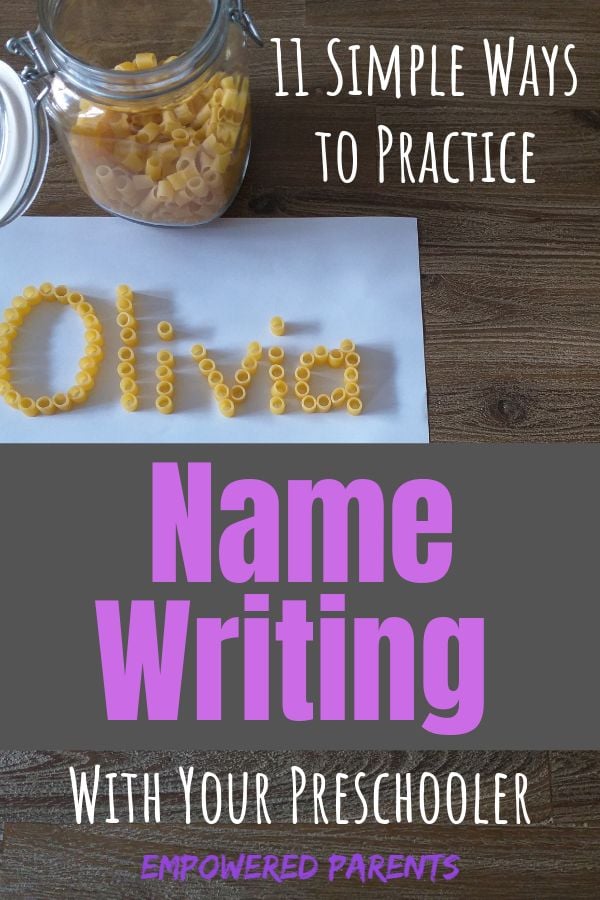
As an alternative to natural products, build your child’s name out of beads or any similar small items – such as buttons or sequins. Or go into the kitchen and find food items such as lentils, pasta or beans.
These can all be pasted to make cool nameplates. Building a name out of tiny items is far more likely to imprint in a child’s memory than simply tracing it on a worksheet.

10. Painting
Last but not least, provide some watercolours and let your child paint her name. She can trace over her name written in pencil or paint freely.
A fun variation is to give your child a painter’s brush and a bucket of water and let her “paint” her name on the wall outside with water.![]()
The more you encourage these kinds of activities, the quicker your child will learn how to form the letters of her name. With time, she will be writing her own name in pencil or crayon on paper and forming the letters with good control.
Learning to write their name makes good handwriting practice for kids as they usually start with the letters in their own name and then from there naturally progress into wanting to learn the other letters of the alphabet.
Their name is also the first place they recognise the connection between letters and words as representing ideas and things. This is an important principle in learning to read and write.
Here are some more fun pre-writing activities for kids.
10 Ways to Do Name Writing Practice Without Worksheets
Notes
Here are some fun name-writing activities for preschool kids to try at home or school.
Ditch the boring tracing sheets and workbooks and try some of these real, hands-on learning experiences.
When teaching children to write their names, remember these five key principles:
- Engage the Senses: Use multisensory activities like moulding letters, baking name-shaped cookies, and singing name songs to stimulate touch, taste, smell, sight, and hearing.
- Use Large Muscles: Build gross motor skills with activities like walking the letters of their name, helping kids learn through full-body movements.
- Involve Fine Motor Activities: Encourage fine motor development with materials like crayons, playdough, and small objects, introducing pencils later for better grip.
- Model the Name Correctly: Show correct letter formation often and label items with their names to help kids recognize both uppercase and lowercase forms.
- Save Tracing for Last: Start formal tracing only after kids have practised through hands-on activities, ensuring they have the motor control and pencil grip needed for refining letters.
Try these simple name activities with your kids:
1. Shaving Cream
Pour shaving cream onto a small tray and let children trace their names into it. They will love the texture and the fun sensory experience.
2. Sandpaper
Use a sheet of sandpaper from the hardware store. Trace the letters onto the rough surface. This provides a good tactile experience and helps the brain to feel the formation of the letters.
You could also write the letters on the paper in chalk and then get your child to trace over your letters.
3. Jumbo Chalk
Start by writing the name in large, life-sized letters on the pavement outside with jumbo chalk. Invite the child to walk along the letters as if walking a tightrope.
Then, make the letters slightly smaller and ask them to trace with their fingers. The letters should be big enough that they have to move their arms from left to right and up and down, crossing the midline while tracing.
4. Rope
As in the previous activity, form the name in life-sized letters and ask your child to walk around each letter as if walking along a tightrope.
Make sure to teach the correct formation by starting in the right place, as you would when writing the letters. This activity allows children to feel the letters using their whole body.
5. Playdough
Playdough is an excellent material for teaching letters through tactile experience. Build the letters of your child’s name together onto a piece of cardboard and leave it to harden as a permanent nameplate, or bake it in the oven to harden.
6. Finger Paint
For a fun, messy activity, give your child some finger paint and let him “write” his name with his fingers. This will encourage fine motor development of the small finger muscles.
You could also write the name in pencil on a large piece of paper and let him trace over your letters.
7. Salt
Make a salt tray by pouring some salt into a small tray or dish. The salt can be substituted with sand or any similar substance. Trace the name into the sand.
This is a similar experience to the shaving cream activity and will help your child remember the letter formation by feeling her fingers move through the salt.
8. Natural Materials
Why not go into your garden and make use of what nature gives us for free to teach name writing?
Gather small stones, twigs or leaves and get creative by joining them into the shapes of the letters. Provide some wood or craft glue and paste them to make a nameplate to keep.
9. Beads
As an alternative to natural products, build your child’s name out of beads or any similar small items - such as buttons or sequins. Or go into the kitchen and find food items such as lentils, pasta or beans.
These can all be pasted to make cool nameplates. Building a name out of tiny items is far more likely to imprint in a child’s memory than simply tracing it on a worksheet.
10. Painting
Last but not least, provide some watercolours and let your child paint her name. She can trace over her name written in pencil or paint freely.
A fun variation is to give your child a painter’s brush and a bucket of water and let her “paint” her name on the wall outside with water.
The more you encourage these kinds of activities, the quicker your child will learn how to form the letters of her name. With time, she will be writing her own name in pencil or crayon on paper and forming the letters with good control.
Learning to write their name makes good handwriting practice for kids as they usually start with the letters in their own name and then from there naturally progress into wanting to learn the other letters of the alphabet.
Their name is also the first place they recognise the connection between letters and words as representing ideas and things. This is an important principle in learning to read and write.
Bing Mares
Tuesday 15th of October 2024
Thank you.
Tanja McIlroy
Tuesday 15th of October 2024
You're welcome!
Naila Nazeer
Wednesday 15th of July 2020
Good site for pre school
Tanja Mcilroy
Thursday 16th of July 2020
Thanks Naila. I like providing useful info for parents and teachers too!